Are you looking for a way to reduce photo size without compromising image quality? In the digital age, images have become everything in our lives, whether for personal or professional use. However, with the increasing demand for high-quality images, the file size of these images has also increased significantly.
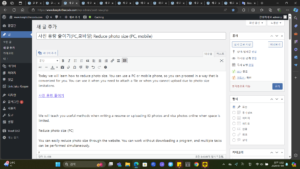
Large photo files are difficult to store, move, and optimize on websites, which slows down loading times and increases bandwidth consumption. Now is the time to compress the image. In this article, we will talk about six ways to reduce photo file size without compromising image quality. Read on to find out more.
Part 1: What it means to reduce photo size
Part 2: What are the benefits of image compression?
Part 3: How to reduce photo size without compromising image quality
Method 1. Compress images with Photoshop
Method 2. Compress photo files using Microsoft Word
Method 3. Take images in compressed JPEG format
Method 4. Use the Microsoft Photos app (for Windows)
Method 5. Use the Preview app (for Mac)
Method 6. Use free photo size reduction sites
Tip: How to improve low quality photos to high quality HOT
Part 1: What does image compression mean?
Image compression is the process of reducing file size without significant compromise on visual quality. This is an essential technology for optimizing images for storage, movement, and display purposes. By compressing images, you can make file sizes smaller, which makes them easier to manage and uses less bandwidth. Image compression aims to find a balance between reducing photo file size and maintaining image quality so you can use your images anywhere.
Part 2: What are the benefits of image compression?
Reduce photo file size: Image compression significantly reduces the file size of your images, allowing you to store, move and share your files efficiently.
Faster loading times: Compressed photos load faster, especially on websites and programs, improving user experience.
Bandwidth Optimization: Compressed images consume less bandwidth, which reduces data usage and associated costs.
Improved storage efficiency: Compressed images use less disk space, which allows you to store more images without consuming storage space.
Part 3: How to reduce photo size without compromising image quality
Now, let’s take a detailed step-by-step look at image compression technology that efficiently improves your image files without compromising image quality.
Method 1. Compress images with Photoshop
Adobe Photoshop is a powerful and popular photo editing program that offers many tools and features, including image compression features. Using Photoshop’s export options, you can easily compress images without compromising image quality. Below are the steps to reduce Photoshop photo size.
Open the desired image in Photoshop.
Go to the “File” menu at the top of the screen and select “Export” and “Export As.”
Export As
In the “Export As” window, you will see the quality setting and image size marked as 100%. For the sample image here it is 1.3MB.
Check image size
Use the slider to adjust the picture quality settings as needed. Lowering the image quality percentage will also reduce the file size.
Adjust image quality settings
If you are satisfied with the image compression results, click “Export” to save the compressed file.
Method 2. Compress photo files using Microsoft Word
Microsoft Word has a handy option to compress photo files without losing quality, which will reduce both the image’s file size and size. Using Word ‘photo compression’, you can optimize images for various printing situations while maintaining visual quality. This way you can adjust the photo size.
Open an existing or new Word document, click the “Insert” tab at the top of the screen, and then select “Photo.”
Select the image file you want to compress and insert into your Word document. Once the photo is inserted, click it to activate the “Photo Tools” tab.
Go to the “Format” tab under “Picture Tools” and click “Compress Pictures.”
picture compression
In the “Compress Photos” dialog box, click on the desired compression options as required and press the OK button.
Choose photo compression options
It will reduce the image size and compress the photo capacity, and you will now be able to save the Word document.
Method 3. Take images in compressed JPEG format
JPEG is a popular file format for image compression without loss of quality. Uncompressed RAW files allow for great freedom and creative control, while shooting in JPEG format is a convenient choice when you already have a clear idea of how you will use your photos. Whether you’re uploading to the web, saving to disk memory, or sharing to social media platforms like Facebook or Instagram, choosing the compressed JPEG file type will save you time and storage space.
Method 4. Use the Microsoft Photos app (for Windows)
If you are a Windows user, you can use the Microsoft Photos app to edit images without losing quality. This method allows you to easily resize and adjust image quality for optimal compression while maintaining visual integrity. Just follow these steps:
Step 1: Download and install the Microsoft Photos app.
Step 2: Right-click the image file you want to compress and select “Open with” > “Photos” app.
connection program
Step 3: Click the three buttons at the top right of the app interface to open the drop-down menu and select “Resize Image”.
Note: If you don’t see the “Resize Image” option in this method, your image file can no longer be compressed. You can easily compress your photos by referring to the other methods introduced in this article.
three dots icon
Step 4: In the new pop-up window, select the default size option. Choose from four options: small, medium or large, depending on your needs. Alternatively, you can select “Define custom size” to manually set the size of the image as desired and convert the photo size. The Photos app will let you manually adjust the quality and size of your photos to achieve the optimal compression level.
4 size options
Step 5: After making the necessary adjustments, click “Save” or “Save a Copy”.
save
Method 5. Use the Preview app (for Mac)
If you’re a Mac OS user, the Preview app provides a wide range of useful features, such as image compression. Using this method, you can easily adjust the size and ratio of photos and easily reduce the file size without deteriorating image quality. You can do it like this:
Open the photo you want to compress in the Preview app on your Mac. From the menu bar, click “Tools” and select “Resize” from the drop-down menu.
Select sizing
The “Image Size” dialog will open, allowing you to compress the photo in three different ways depending on your needs.
Image size compression
Check the “Image Resampling” option. Enter the desired width and length values to resize the image. After entering the values, you will see the image compression percentage and the final size of the compressed photo.
Select “Maintain Proportions” if you want to keep the photo’s original proportions. Maintain image proportions by selecting the desired pixel size option from the “Change” drop-down menu.
If you want to reduce the size of your photo without compromising quality or detail, uncheck the “Resample Image” option before adjusting the width or length.
Click the OK button to apply the changes. Next, go to the “File” menu, select “Save As” and save the compressed photos with a different name than your Mac disk.
Method 6. Use a free online image compression program
Imagesmaller is a friendly photo size reduction site that allows you to compress images without losing quality. Now, let’s learn how to reduce photo size using Imagesmaller, an online photo size reduction program.
Visit the Imagesmaller website.
Select the images you want to compress on your computer.
Select the image you want to compress
Open the image and wait for the program to compress the image. It usually takes 10-15 seconds.
Once compression is complete, download the compressed image to your device.
Download compressed images
Each method has its own features, options, and settings for image compression. You can choose the method that suits your preferences and needs.
Tip: How to improve the quality of poor quality photosHOT
You will encounter many situations where the quality of image files deteriorates. If image quality has been degraded or damaged due to incorrect operations during image compression, you can use the 4DDiG File Repair program to improve image quality. You can do it like this:
The 4DDiG File Repair program runs on Windows PC. Go to the “AI Enhancement” tab and click the “Start” button under “Improve Photo Quality” to begin the photo enhancement process.
safe download
safe download
Choose to increase photo quality
Click the “Add/Drag Photo” button or drag and drop the desired photo into the area.
Add photos to improve picture quality
After importing a photo, select one of three AI model options: a regular model, a noise-removed model, or a face-only model. Each AI model is designed for a specific type of photo. Adjust the picture quality to suit your needs and click the “Start Conversion” button to see the improvements.
Choose an AI model
4DDiG File